Thursday, August 1, 2013

Green Tomatillo Salsa - Canned

Tomatillos don't have to be peeled just cored and chopped.
I loved canning Green Tomatillo Salsa! Unlike the tomatoes that are used in Tomato Salsa, you don't have to peel tomatillos. You just have to chop them up and throw them in. This is a lot less work and the results are delicious.


I followed Ball's recipe for Tomatillo Salsa. Which can be found here. I have also included it below with a few changes that I made.
Simmering Tomatillo Salsa


 5-1/2 cups chopped cored husked tomatillos (about 2 lbs or 27 medium)
1 cup chopped onion (about 1 large)
1 cup chopped green chilies (I used a combination of Jalapenos and green peppers.)
4 cloves garlic, minced
2 Tbsp minced cilantro
2 tsp ground cumin
1/2 tsp salt
1/2 cup vinegar
4 Tbsp lime juice
4 (8 oz) half pint glass preserving jars with lids and bands
I omitted the Red Pepper Flakes because I chose to use Jalapeno Peppers. 

Directions:

Combine all ingredients in a large saucepan and heat to a boil. Reduce the heat and simmer for about 10 minutes or until salsa reaches desired thickness.
Ladle the hot salsa into prepared jars leaving 1/2 inch head space. Wipe rims and put hot lids and bands onto jars.
Process jars in a boiling water canner for 15 minutes, adjusting for altitude. Remove jars and cool. Check lids for seal after 24 hours.


Remember that it is not safe to change the ratio of tomatillos, peppers, onions, and garlic to the amount of acid used (vinegar and lime juice). The only thing that can safely be changed is the amount of spices you use. Always use an approved recipe when canning salsa.

Home Canned Tomatillo Salsa
You can also try my recipe for Roasted Tomatillo Salsa found here.

Monday, July 29, 2013

A Gallon of Water a Day: My New Challenge

Drink a Gallon of Water a Day for Better Health
On Friday, I was reading a magazine at the doctor's office. It was some random beauty magazine that I was just thumbing through. There was this picture of an actress or model, some name I didn't recognize, and it said she was 40 years old. The photo of her looked like she was in her late 20's. She really did look great. Now, I know that the photo was probably airbrushed and all her cellulite was magically removed with the click of a mouse. It wasn't so much her photo that caught my attention. It was the little caption by the picture asking her what her anti-aging secret was. She said that in her 30's she had starting drinking a gallon of water a day and that had changed everything for her. She noticed immediate changes in her hair, skin, nails, weight, etc. and that she had been drinking a gallon of water every day since then. This is nothing really new of course, we all have heard about the health benefits of drinking more water, and the majority of us don't drink near as much as we should. I know I fall into this category myself. But the thought struck me at that moment at really how simple it could be, drink a gallon of water a day, to change your health for the positive in a significant way. So I decided I would give it a try and see how it would benefit me. Now obviously this commitment has to be long term and I plan for it to be just that. So far I haven't noticed any change except the obvious, but at eight months pregnant what is a few more trips to the bathroom. I have been at it for 3 days. The first day I failed, I could only get down a half of a gallon. I didn't start early enough, that is the key. The second day I almost made it, only fell a few cups short. Today is my third day. It is almost 4 pm and I am almost done with my gallon. My method for doing this was to rinse out an empty milk jug and fill it up each night, so it has all night in the fridge to get nice and cold. I highly recommend using some kind of container so you can really see your progress. You have to drink a lot of water in the morning I think to be successful, especially if you don't want to be up all night, which is already a problem for me anyways. If you think about it, drinking that much water really makes it so you eat less and you are not drinking other things that are high in calories, like soda or juice. That will definitely help you to shed unwanted pounds and be healthier overall.  At eight months pregnant I know I won't see any obvious change in my weight at least right now, but I am hoping that once this little sweetheart arrives, my new habit of drinking a gallon of water a day will help those pounds melt off. In addition even if you are already at a healthy weight drinking more water has so many other health benefits, so everyone should do it.  I will keep you updated on my progress and if you decide to give this a try, let me know how it works for you. One thing I do know is it can't hurt.

A New Adventure. . .

Once again, you may have noticed we haven't been posting much lately.  Life has hit us with another major change recently and so things have been very busy around here. Jacob started a new job in Arkansas about a month ago now. We are very excited about our New Adventure. The kids and I are still in Texas, working on selling our home. So there hasn't been much time for blogging, but I am working on a few posts that will be coming your way soon. So check back . . . We hear that Arkansas is great for gardening, a lot more rain than we get here, that in and of itself is exciting for us. Ya'll know how we love to garden . We can't wait to get our hands into some Arkansas soil.

Sunday, June 30, 2013

Homemade Laundry Detergent: Update

I have been making Homemade Laundry Detergent for quite some time now. It saves a ton of money. It is easy to make and I am happy with the cleaning results. I posted the recipe for it here: http://ourprovidentlife.blogspot.com/2012/01/homemade-laundry-detergent.html . Since that post I have made one change to my detergent that I really like and so I wanted to update everyone in case you wanted to try it out.
Fels-Naptha great for Homemade Detergents

Here is my original recipe:
1 Bar Grated Soap (Ivory or Zote)
1 Cup Borax
1 Cup Washing Soda


Instead of Ivory which is what I was using I decided to try out Fels-Naptha. Well I love it. I think it is far superior to Ivory (sorry Ivory, better for the shower I think). The Fels-Naptha grates up nicely (looks like cheddar cheese) and has a great scent to it.


Grating up my Fels-Naptha for Homemade Laundry Detergent
The great thing about the Fels-Naptha is you only have to use 1/3 bar to equal 1 bar of Ivory. So I always make a triple batch of detergent.  Here is the new recipe:

1 Bar Grated Fels-Naptha Soap
3 Cups Borax
3 Cups Washing Soda
Mix Thoroughly. Use 1 TB. per load.

I have not tried Zote out yet but I will give it a shot in the future and let you know where I think it ranks. As for now, I am loving the Fels-Naptha and the cost is pretty much the same. If you are interested in a break down of how much homemade detergents and cleaners can save you check out this post: http://ourprovidentlife.blogspot.com/2012/04/making-cents-of-cleaning.html.

You can find Fels-Naptha, Borax, and Washing Soda in the laundry isle at your grocery store.

Tuesday, June 25, 2013

One Pot Wonder Pasta

So I know I promised more posts and my intentions were sincere and honest, but life has a way of changing things unexpectedly for most of us and that is what it did to our family. We got news a few weeks ago that we are moving to Arkansas. In fact, Jacob has already started a new job there, leaving Shaun-ta' behind to wrap up things in Texas and sell our home. (This is nothing new for me.) One thing I am truly grateful for this time is that I have a new home and so there will be no long nights of peeling wallpaper, endless painting, texturing walls and ceilings, etc. Yes, I am definitely grateful for that. But I have been super busy and I am 7 months pregnant, so by the end of the day I am beat, and I honestly have no desire to cook dinner by this point. But I still want to eat something delicious. It is such a dilemma. I ran across this recipe today, just by chance, or maybe by fate, because I really wasn't looking for a recipe. It was already 5:30 and I hadn't gotten anything out for dinner yet and I was thinking, "Oh, no cold cereal again." But then I came across this recipe for One Pot Pasta over at Apron Strings and dinner was saved. Dinner was done 20 minutes later and I mean done and it was delicious and healthy. I made a few changes from the recipe on Apron Strings but only to accommodate what I had in the pantry and garden.

Here is the original recipe:

ONE POT WONDER TOMATO BASIL PASTA
Serves 4 to 6 as an entree

12 ounces linguine pasta
1 can (15 ounces) diced tomatoes with liquid ( I used zesty red pepper flavor)
1 large sweet onion, cut in julienne strips
4 cloves garlic, thinly sliced
1/2 teaspoon red pepper flakes
2 teaspoons dried oregano leaves
2 large sprigs basil, chopped
4 1/2 cups vegetable broth (regular broth and NOT low sodium)
2 tablespoons extra virgin olive oil
Parmesan cheese for garnish

Place pasta, tomatoes, onion, garlic, basil, in a large stock pot. Pour in vegetable broth. Sprinkle on top the pepper flakes and oregano. Drizzle top with oil.
Cover pot and bring to a boil. Reduce to a low simmer and keep covered and cook for about 10 minutes, stirring every 2 minutes or so. Cook until almost all liquid has evaporated – I left about an inch of liquid in the bottom of the pot – but you can reduce as desired .
Season to taste with salt and pepper , stirring pasta several times to distribute the liquid in the bottom of the pot. Serve garnished with Parmesan cheese.
One Pot Wonder Pasta

My changes:

I used 13 oz. of Whole Wheat Angel Hair Pasta
I used about 15 oz. of fresh tomatoes from the garden. Yum!
I chopped up my onion and garlic. - The kids don't do big chunks.
I skipped the red pepper flakes, cause the kids don't do heat.
I only used 4 cups of Home Canned Chicken broth, because I used angel hair pasta I knew it would require a bit less liquid and cooking time.
I also added some fresh portabella mushrooms that I had on hand - a very yummy addition!

It turned out delicious and it was so fast and easy!

20 Minute Meal - One Pot Pasta


Thursday, May 30, 2013

DIY: Frozen Spinach

Large bunch of Spinach harvested from our Garden.
As the days started to get warmer here in East Texas I knew that the days of being able to satisfy my spinach cravings were numbered. It made me a bit sad, because my spinach has been doing so well and we have all been loving it. As it started to bolt I decided to preserve a bunch of it by freezing.

Freezing is actually a really great way to preserve vegetables from your garden. Freezing allows you to preserve most of the nutrients and also helps to maintain the color and flavor.
Three bowl set up for freezing homegrown spinach.

For most vegetables blanching and cooling is a necessary step to properly preserve them. Blanching stops the enzyme action that helps vegetables to grow and mature. 

I used a three bowl set up to blanch and cool my spinach very quickly. It only took me about 20 minutes to do the whole batch.
Blanching Homegrown Spinach.

Cooling Spinach after blanching.

Draining water off of blanched and cooled spinach.

Of course the first step is to thoroughly wash the spinach, cut off thick stems and take out any bad leaves. Then you can start the blanching process.

The first bowl is for blanching. I have a large stock pot with a colander that fits inside, perfect for blanching. But you could also scoop it out with a slotted spoon.  Bring the water in your stock pot to a boil. Then add your spinach. I did several small batches because you want your spinach completely covered with water. Cover the pot and blanch for 3 minutes.
 

Remove your spinach promptly after 3 minutes and put it in a bowl full of ice water. I placed a colander inside a larger bowl of ice water for quick and easy transfer. Allow the spinach to cool for the same amount of time. If you are doing several batches be sure to change your water or add more ice to keep the water cold.


After cooling I transferred my spinach into another colander placed over a bowl to allow it to drain. After it drained for a bit I used my hands to squeeze out the remainder of the water.
Blanched, cooled, and drained spinach all ready for freezing.


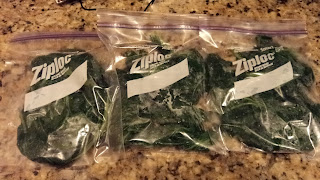
After my spinach was blanched, cooled, and drained I placed it into Ziploc bags. Here they are all ready for the freezer. I got three quart sized bags of spinach from my garden that day. I was very excited. It was much easier than I thought and didn't take much time at all.


Remember that each type of vegetable has a different blanching time to prepare it for freezing. If you want to freeze other types of vegetables there are various places you can find time charts. Here is one from the Colorado State University Extension. Freezing is another way we can preserve some of that great garden harvest. Happy Freezing!

Also remember this great water conservation tip and use all that great spinach water to water you household plants and pots.

Tuesday, May 28, 2013

Goin' Green

Kale - Nutritional Powerhouse
Unfortunately for us, our green season has pretty much come to a close. By "Green" I mean our garden greens. We have been loving them. For many of you though you still have some green days ahead. If you haven't been planting greens in your garden you should give them a try. We have found them amazing easy to grow and extremely delicious. Most importantly they are packed with nutrition. Let me tell you about a few that we grow.
Kale in a planter.
Giant Winter Spinach

Kale is a nutritional powerhouse. It is said to be one of the healthiest vegetables on the planet. In addition it grows easily and it is very pretty. I even planted kale in my decorative flower pots.  Kale is of course extremely low in calories but is loaded with fiber, and is highly concentrated with the antioxidant vitamins A, C, and K. We love kale both raw and cooked and we have been eating a lot of it.


Spinach had long been know for being an iron rich vegetable. It also is a good source of fiber, folate, and vitamins A, C, and K. I have actually been craving spinach for most of the spring.


Bright Lights Swiss Chard

Leaf Lettuce


We have struggled to grow Swiss Chard in the past. But it grew beautifully this year. I am so glad, because it is delicious! I love it! We have really been enjoying it. It is also full of vitamins A, C, and K and is rich in dietary fiber and protein.The stems on this Bright Lights Swiss Chard remind me a lot of rhubarb, not only appearance but taste as well.


Although, not as high in nutrients as many of the other greens, lettuce is still a tasty choice. The greener and more colorful the lettuce the more nutrient rich it is. Iceberg lettuce has the lowest nutritional value of all lettuces. We grow a bit of leaf lettuce in our garden but to be honest most things we would use lettuce for (hamburgers, sandwiches, and salads) we choose to use spinach or one of the other greens instead. Most often we will mix it with other greens for a tasty salad.

Giant harvest of beet greens.


Another really great green that we often have an abundance of is beet greens. I have to admit these are not my personal favorite, but they have grown on me. I didn't care for them at all in the past, but now I will occasionally eat them sauteed and we like to throw them into our "Green" Smoothies. This is the beet green from last years harvest of beets. We planted a lot and canned and pickled beets. This year we only planted a few for greens.
The wonderful thing about greens is you can continually harvest them. I usually cut the outer leaves first and leave the younger inside leaves to grow and mature. The more you harvest them the more they will grow.

Swiss Chard being Sauteed with garlic and onion.


We use greens in a variety of ways, but our favorite way is to throw them in a smoothie. At least this is the way the kids enjoy them most because, they can't really taste them. :)  Jacob and I love them sauteed with garlic and onion. We like to add sauteed greens to things like scrambled eggs and pasta dishes. I will also add pureed greens to my pasta sauces. Of course, we also enjoy them raw in salads. It is most beneficial to grow greens yourself and harvest them as you use them, because once you have harvested them the nutrients begin to deteriorate. It has been show that frozen spinach (I am sure this is true for other greens too) actually contain more nutrients than the store bought fresh spinach, because by freezing the spinach you lock in the nutrients. Check back in a few days for a post on how to freeze your own spinach or other greens.

Variety of greens from the garden harvested for a smoothie (kale, chard, spinach, and flat leaf parsley).


Tuesday, May 14, 2013

Family Home Evening

Jacob and I do a lot of posts about the temporal aspects of Provident Living, especially having to do with home production and storage and physical health.  These are important aspects of Provident Living and areas where we are currently learning and doing a lot. Sometimes I forget about sharing some of the other ways we strive to live our lives more providently on a daily basis. Some of the things that we do really seem so commonplace to us because we do them all the time and we have been doing them for a long time that I forget they really are important parts of living a provident life too. One of these important areas of provident living is taking care of our spiritual and emotional needs. Every week (in addition to our Sunday church services) our family participates in something we call Family Home Evening. We take one night a week together as a family to spend special time with one another to focus on spiritual things. During this time we sing songs, have a lesson that is spiritual in nature, and do family activities. These nights allow Jacob and I to give our children and ourselves more in depth spiritual instruction and they give us that spiritual uplift that helps us to get through the upcoming week. Because our children are still very young, we keep our lessons short and sometimes make our activities a bit longer. We also sing spiritual and uplifting songs, which is something we all enjoy very much and we try to learn new songs as well. We encourage our children to ask questions and participate a lot in the lessons we have planned. In fact, each week we assign different family members to plan various aspects for the next weeks Family Home Evening.  This helps each one of us to develop different skills and allows to share our talents with each other. We love Family Home Evening. I especially love the feeling of peace and unity that it brings into our home as we talk about the Savior Jesus Christ and His Gospel and our great love for Him.

We have decided recently to to begin preparing our Family Home Evening Lessons from the most recent General Conference of the Church of Jesus Christ of Latter day Saints. We prepare and plan our lessons and activities from the talks that were given at this conference. We also include appropriate hymns and scriptures that go along with the topics as well as an activity that usually involves treats ( our kids favorite part).

Yesterday, I prepared the lesson from a talk entitled, "For Peace at Home", given by Elder Richard G. Scott of the Quorum of the Twelve Apostles. Elder Scott, spoke about the things that we can do to bring more peace into our homes. Some of the principles he mentioned were family and personal prayer, scripture study, and weekly Family Home Evenings. He also talked about the importance of making Jesus Christ the center of our home, and promised that when we do this there will be peace and serenity. He also suggested that as we work to achieve this goal in our homes we reach out to others in friendship, love, and service, so that might feel that peace in their lives as well.

After our lesson, and some songs, together as a family we made a family treat with the intention of sharing some of our treats with a family in our neighborhood that is moving away.

We made "Scripture Cookies" which reinforced the importance of reading the scriptures in our home and also gave us a way to serve those around us. It was a fun activity. The kids loved listening to each scripture for the clues they needed to make their cookies.

Family Home Evening is just one way that we use in our home to strengthen ourselves and our children spiritually and emotionally. We know that as we hold weekly Family Home Evenings our lives our enriched and blessed and we experience more of the peace and serenity that is promised us as we strive to center our home around the Savior Jesus Christ.

Below is the recipe for Scripture Cookies. We hope you enjoy them at your next or first Family Home Evening.

Beat Together:                                                            Key:
3/4 Cup (Psalms 55:21)                                            1. Butter
1/3 Cup (2 Nephi 26:25)                                           2. Milk
1&1/2 Cup (Jeremiah 6:20)                                      3. Sugar
2 (Isaiah 10:14)                                                          4. Eggs

Add:
2 Cups (1 Kings 4:22)                                                5. Flour
1 tsp. (Solomon's Song 4:14)                                    6. Cinnamon
1 tsp. (Doctrine & Covenants 101:39)                     7. Salt
1/2 tsp. (1 Corinthians 4:6)                                        8. Baking Soda
3 Cups (Doctrine & Covenants 89:17)                      9. Oatmeal
1 Cup (Samuel 30:12)                                                10. Raisins

Drop by spoonfuls onto greased cookie sheet. Bake at 350 degrees for 15 minutes. While baking read (History of Joseph Smith 1:37 and Doctrine and Covenants 133:11) to remind you to watch them carefully so they don't burn.

For access to the 2013 edition of the scriptures for the Church of Jesus Christ of latter-day Saints click here.

Thursday, April 25, 2013

Egg Shell Seed Starters

 As I was doing a little Easter shopping online I came across some ceramic Easter eggs that had seedlings in them that you could water and then they would grow. This got me thinking that real egg shells would actually be great seed starters. They have tons of calcium in them so you can just put them directly in the ground and it will give your new plant a calcium boost. So I thought I would give it a try. Jacob was the expert at cracking the eggs at the very top, keeping the rest of the shell in tact.

Then I simply gave the shells a good rinse. The kids helped me fill them with soil. We used a large needle to poke holes in the bottom of each of them so we could simply fill the egg carton up with water and they could stay moist from the bottom up. We filled our egg shells with pepper seeds. We really like peppers around here and use a lot in our canned salsa recipes. We planted a big variety this year. I hope they do well.

A couple of weeks later we had pepper plants peeking out of each one of our egg shells. Yay! Success! When I planted my peppers, I gave each shell a little squish and put it directly in the ground. They make perfect, organic, and completely biodegradable seed starters. I am thinking this is a great idea. I will be starting a bunch of seeds in egg shells for next year's garden. 

What a Busy Spring. . .

It has been such a long time since I have had a chance to post anything new. It has been such a busy spring for us. We have expanded our garden a bit this year and that has been a bit of work but we are really looking forward to the additional harvest. We are once again going to keep track of our harvest totals for the year to see how much more we can produce with just a little bit more space. (Check out our totals on the side bar.) Things are already looking good. We have been harvesting kale, spinach, and strawberries like crazy. It has been great we are really enjoying the kale and spinach in smoothies and just gobbling up the strawberries fresh. I have also had a few busy months helping out with my sister's wedding- she got married in the Provo Temple last Saturday. I was lucky enough to get to sew skirts and ties for the wedding. When I say lucky I really mean it. I love to sew and I was thrilled to be asked to help out. We also made the journey to Utah last week to be there for the wedding. It was wonderful and even though it was a short trip I am so glad we were able to make it. We made it back safely but unfortunately, not all of us came back in one piece. As we were loading the van to leave our two year old had an accident on the trampoline. We were hoping for just a twisted ankle but we came home to find out she actually fractured her tibia, so now the poor little thing has to have a cast for 6 weeks. Which means, I will still be extra busy for the next 6 weeks as my previously very active and mobile toddler now has to be carried everywhere. I am feeling exhausted just thinking about it. In other news, we are expecting our 4th child at the beginning of September. We are very excited and we were able to surprise our family with the news on our trip to Utah. So many things are happening around here, but I hope to get back to posting about some of the things we have been up to, there really is a lot to share, so check back for future posts.

Friday, April 12, 2013

My Interview with Jack Spirko on TSP

I wanted to share with you my interview with Jack Spirko on The Survival Podcast (TSP).  He had me on to talk about home energy efficiency, building methods, materials and misnomers.  We cover everything from energy design, energy audits, insulation, SIPs, ICFs and earth sheltered homes etc. We also briefly discussed BeePreserve.com and our Mason Bee Partner program   

Jack's show is a level headed approach to preparing for tough times while working to improve your life each day.  His tag line covers it well "Helping you to live a better life, if times get tough or even if they don't".  His daily podcast covers everything from gardening, permaculture to politics and how to preserve food.  There really is a show for everyone, no tin foil hat required. 

The TSP forum is a great place, where quite a community has formed.  The amount of information you can gather from his 1100+ shows and the depth information in the forums will feed your demand for knowledge for years to come.  Check out The Survival Podcast I know you'll like it.


TSP Interview with Jacob Nielson

Thursday, March 14, 2013

No Cost Mason Bee Service

Male Blue Orchard Bee
I just wanted to put a a quick post about a no cost mason bee service we are offering.  Head over to BeePreserve.com for more details.  In a nutshell Mason Bees are a solitary, sting-less bee that provides great pollination for fruit trees, and ornamental plants.  Their numbers are limited due to pests and limited range. 

Though management of  them we are able to increase their numbers, which provides more bees to more backyard gardeners, orchardists and insect lovers.  Eventually we will be able to offer pollination services to local orchards and farms. 

Basically the Bee Partner Program works like this:  If you have a good yard full of springtime blooms (fruit trees, shrubs and ornamental plants) and a source of mud. We will provide you with mason bee house and nesting block and some mason bees still cozy in their cocoons. 

You take care of these bees for about 3 months by simply;
  • putting up the house on the south or southeast side of your house or other solid structure
  • Give them a little mud to use in their nesting process. see Mud is the Key.
  • Keep an eye on them for insect eating birds
  • Don't use any pesticides in your yard
We pick them back up after about 3 or 4 months and take them into a protected environment where they are kept from pests and under climatically controlled conditions.   Late in the fall we go through all of the nesting blocks and tubes and extract out the cocoons and clean out the mud and pests.  We store them in the right temperature and humidity until the next spring when we repeat the process and share the surpluses with others in the area.

We are currently operating in the "4 corners" area of Texas, Oklahoma, Arkansas and Louisiana.  We also have a program staring up in a couple areas of Utah in spring 2014.  Click Here to become a Bee Partner.  If you do not live in these areas, feel free to contact us, we may be able to put together a remote program for you and some friends or hook you up with a closer program if one is available.

For more info please visit us at BeePreserve.com were we not only are working to preserve our bees but create Bee Preserves where they can thrive.

Monday, March 11, 2013

Granola: Raw and Sprouted


In my efforts to learn to grow and use sprouts I wanted to make some granola with them.  I found a great video and website where they made raw granola, it looked pretty good but I wanted to adapt it some to my own tastes.  Around this time I also found a blog that talked about soaking oats (I have been unable to find oat groats nearby).  Soaking, just like sprouting, breaks down the Phytic acid in grains, making them easier to digest and increases the available nutrition of the grain.  Phytic acid is often called an anti-nutrient, it binds up vitamins and minerals as it passes through the body. 
Sprouted buckwheat, Soaked Oats, Swelled Almonds/sunflower

So I took the raw recipe, the soaked oats and a granola recipe from Alton Brown and combined them together into my version.  It is only slightly sweet, if you want it sweeter you could add some maple syrup or brown sugar or even a slight drizzle of honey in your cereal bowl with warm milk.


 Sprouted Granola

3 cups soaked rolled oats (soaked in yogurt overnight, drained see below)
Toasting Coconut in a hot Cast Iron Pan
1 cup sprouted (swelled) almonds
1 cup sprouted buckwheat
1/2 cup  swelled sunflower seeds (soak only for 30 min)
3/4 cup shredded sweet coconut (roasted)
1/4 - 1/3 cup of local honey
1/4 cup olive oil or coconut oil (warmed)
3/4 teaspoon salt
1 cup raisins
1 tsp Cinnamon (optional)

Mix all together and  layout on wax paper on your dehydrator trays.  Dry on 120 degrees or less till dry, crumbly and completely.  Remove from trays and enjoy.
Soaking oats in Yogurt and Lemon Juice


Soaked Oats
4 Cups of whole oats
4 Cups of water
8 Tbls. Yogurt or Whey or Lemon Juice
Soak for 12-24 hours, place in cheese cloth and drain.

Sunday, March 10, 2013

My 5K Run


Yesterday I ran a 5K that a local charity was putting on.  It was fun though quite tough.  I literally have not run for years and years, it would have been a good idea to prepare some for it but I went ahead with it.  I decided to just go do it as a way of assessing my current physical fitness.  I knew I could walk 3 miles no problem, but I ended up running more than half of it, I would run and walk and run and walk...I did not do as well as I hoped but now I have a baseline to beat one day.

Physical fitness is an important aspect of living a provident life, keeping yourself fit and healthy is important as well as eating properly.  As of late I have been working on improving my overall fitness, not really working to loose weight or meet any specific result, just improve my overall state.   I have been working on getting more variety of exercise and hand labor, while working to eat far better.

My efforts in my fitness has more to do with being overall more fit.  I don't want to be able to run a marathon but unable to dig swales all day.  I am working for a more well rounded state while getting rid of my currently round state. 

I plan to run a 5k once a year or so as a way of measuring my fitness level.  I now have a baseline on how long it took to run yesterday's race.   I expect that as I further improve my health I will be able to run it straight without stopping.  I may run on occasion but you won't catch me out running everyday. 

I would rather get exercise that actually accomplishes something.  Shaun-ta' and I have been working on expanding our garden into the field behind us.  We have been digging swales on contour with wood buried under them which helps to hold water an increases the biological activity.  This is hard physical labor, but the time and energy expended produces something, running on a treadmill does not.        

Friday, March 8, 2013

30 Day Challenge: Results


Not to long ago as part of my 13 Skills for 2013, I set out with a 30 Day Challenge, no sugar(cane or hf corn syrup), soda pop(full sugar type) or fast food.  I really wanted to explore what effects these foods were having on my body.  After 30 days I have had some interesting results and some unexpected ones.

Soda

Cutting out the soda pop I really had to make a conscious effort to drink more water.  Initially I had issues with being a bit dehydrated.  A large issue I have with soda is the high fructose corn syrup that is used in most of them.

Fast Food

Cutting out the fast food was a little difficult, because most days I am not in the office or close to home.  My work takes me all over the area, so fast food is convenient.  I addressed this by choosing to eat a places like Subway or Schlotzky's, where I was able to make good sandwich choices.  Eating at these places can be no better than fast food, but there are good options to be had.

Sugar

It is surprising how much sugar we eat, even when as a whole we are eating pretty healthy.  So many of the everyday foods we eat has sugar in them.  I did allow myself to eat honey and homemade jam on homemade bread.  I did eat more of this the first week or so, but towards the end of the 30 days I didn't have much all all.  My body did not crave the sweetness as much. 

Surprising Results

I was not sure what improvements I would see but I expected to find more energy and be able to sleep better. I was surprised at the results that I received. 

Weight

I ended up with 14lbs of weight loss, I did not exercise beyond yard work.  I expected loosing some weight but not 14 pounds!  It feels good, I am down a notch on my belt and 14 lbs is enough my wife can see the difference.  I didn't exercise because myself and the whole family were sick, and some other things came up that made it hard to do.  If I had been exercising I would have seen more results.      

Acid Reflux/Heartburn

This is one of the biggest surprises, I had no heartburn during this experiment.  I tend to have acid reflux or heartburn most of the time.  On the 2 days where I did eat sugar I had heartburn.  There is no doubt a connection, I know drinking soda can increase the heartburn but I never expected sugar to be the main cause.  I eat a lot of hot food, I love my hot sauce, so some heart burn is expected, however during this experiment I did not have any from the spice or hot sauce.   

Energy / Stamina

I found myself able to go for most of the day without the need for food.  I would find myself late in the afternoon not really hungry but having skipped lunch.  If I had a good breakfast, I could go till dinner no problem.  Yes, I would be hungry but not with painful hunger pains.  In the past, I would find myself shaky and unable to focus.  When I would get to this point I would often reach for the sugar or soda to satisfy the "hunger".  Looks like that hunger I would experience, was merely my body starving for nutrition, by eating all of those empty calories, my body was missing out on the good nutrients it needed.  Cutting out the sugar, soda and fast food forced me to eat better foods with far better nutrition.

30 Days Down, Now What?

So it has been about 2 weeks since I completed the 30 Day Challenge. Yes I have returned to some of my previous trends.  Though now that I have returned to the sugar, soda and fast food, I find myself feeling not as good as before.  The heartburn is back here and there and a few days I have felt that shaky feeling.

So I need to return to the 30 day challenge, I expect I'll go back to about 95% of my previous commitment.  Make far better food choices, eliminate 99% of soda and keep my sugar intake to minimal levels.  By this time next year my honeybees will be well underway, and I plan to replace most of our home sugar use with honey.

For me at least, sugar needs to be consumed at a minimum.  Soda pop needs to be gone forever, on the rare occasion I do drink it I'll try to stick to the cane sugar stuff.  Obviously fast food needs to be a rare occasion and when I do eat it, I will stick to the better options.

Give it a try on your own, 30 days is not long, but long enough for the body to show the effects.

Monday, March 4, 2013

Guacamole

Use a spoon to easily remove an avocado from its skin.


I got a great deal on some avocados and I was really excited because that meant I could make guacamole. I really love guacamole, especially when it is made fresh. 
 First let me share with you the easiest way to peel and core an avocado. Take a sharp knife and run it all the way along the outside of the avocado lengthwise to the core. Twist both halves in opposite directions and gently pull them apart. You can pull the core out of the side it sticks to easily with your fingers. Now that you have two halves you can simply take a spoon and scoop out the whole half of the avocado. 
Slice the avocado while in the skin.


You can also slice or cube the avocado while it is still in the skin and then scoop it out the same way.
Remove the slices with a spoon.


See how easily the slices come out and you can make them whatever size you want. Before making guacamole I enjoyed some avocado slices on a turkey sandwich, so yummy!

So here is my recipe for Guacamole:

8 Large Avocados
4 Small Roma Tomatoes
1 Med. Sweet Onion
1-2 Jalapenos
2 Cloves Garlic
1 to 2 Tb. Fresh Cilantro
Garlic Salt and Salt to taste
Juice from 1 Lime
Fresh Homemade Guacamole

Chop the onion and garlic finely. I like to put mine in my mini food chopper so they are really fine, but if you like them bigger you can just hand chop them. Chop the jalapenos; then mash the onions, garlic, and peppers together with the avocados. Chop the tomatoes and cilantro and stir them in. Then stir in garlic salt and lime to taste.


This recipe makes quite a big batch (about 4 cups of guacamole), but if you ask me it is never enough. Jacob and I enjoyed it along side some chips, on top of some quesadillas, spread on a deli sandwich, and on top of a baked potato. They were all delicious. Super delicious and healthy. Plus, you get the benefits of eating raw onion and garlic.

This recipe comes from one of my friends that I worked with at the VA hospital in Salt Lake City. She also made some killer fresh Salsa, check out the recipe for it here. 

Thursday, February 21, 2013

Spring Spinach Salad

 We have some spinach and lettuce growing in our garden right now that over wintered, yay! We are loving it! A few nights ago I made this delicious salad with a whole bunch of spinach and some of the beautiful leaf lettuce. The recipe was shared with me by one of my good friends. It is so yummy I can't keep it to myself.

Spring Spinach Salad

 Here is the original recipe:
1 lb. Spring Salad Greens
1 large bag Baby Spinach
1/2 C. slivered Almonds (brown in 3T. sugar & water)
1/2 package Craisins
1 Cup Grated Cheese
2 Cups Mandarin Oranges, Strawberries, and Avocado
Toss together well.

Dressing:
3/4 Tb. Poppy Seeds
1/3 Cup Sugar
3/4 tsp. Salt
3/4 Cup Olive Oil
5 Tb. or less of Mustard
1/3 Cup Red Wine Vinegar
1 Tb. Red Onion Grated
Put dressing on salad just before serving.


Jacob and I polished off the whole bowl ourselves.
I made a few changes to the recipe simply because I didn't have a few ingredients and of course I cut it in thirds, just enough for our family to eat. But as you can see we ate the whole bowl. Me and Jacob shared it because the kids aren't big on salad, but we did make them try it.  I couldn't stop eating it.  I didn't have any almonds so I threw in some sunflower seeds. I also didn't have any strawberries or avocado, but I wish I would have. No red onion for the dressing so I left it out, but it would have been a great addition. The lesson here is you can always adapt a great recipe to better suit the ingredients you have on hand. But next time I make this I am going to plan to have the other ingredients, because it would have been that much yummier. At any rate this one was a hit and I can't wait to make it again.

Monday, February 11, 2013

Garden Totals for 2012

456 Pounds of Produce


The grand total for all of our 2012 garden harvests adds up to 456 lbs of delicious top quality fresh food.  We preserved (bottled) a lot of our surplus for later eating, lots of tomatoes, beets, pickles, salsa etc.  We actually had some great bottled beets tonight for dinner, they add a nice color and variety to the dinner plate.  The kids loved how it turned their rice purple.


$861.71 Worth in Produce

So when we add up what all our garden goodness would cost in the store, we come up with $861.71!
That's over $71 per month in fresh off the vine and straight to the table fruit and veggies.

We used normal everyday pricing gathered througout the year.  We did not collect the organic pricing, which our food would stack up well against.  When you look at organic produce, you see a very high premium.
I would place our food above organic, we used beyond organic methods and techniques.  We are learning and progressing in our understanding of permaculture and other beyond organic methods. 

Soil

We have already started to plant our spring gardens.  We are amazed at how great our soil is, its rich, moist and dark.  It is a dream to dig and plant in.  We have used zero fertilizer and have built up our beds with worm castings (from our worm bins), leaves and grass clippings.  We also have incorporated Woody Beds (hugelculture) into most of our beds reducing water demands.  We are also amazed at how much life we find in the soil, its full of great insect life.

2013: Looking Forward

We look forward to this year, we hope to grow far more than last year in the same space.  We also are expanding our gardens out into the field behind us, planting in swales and contour beds.  We hope to greatly expand our harvest with this small area, we also plan to plant some pumpkins, squash and goards for market too.